Accounts & Teams
Overview
Accounts are a core piece of functionality for many applications these days and Jumpstart Pro comes preconfigured with them so you don't have to do any of the heavy lifting. The name Account is a generic term but can be thought of as a vehicle for creating teams or organizations as well as personal accounts.
The Account model is the mechanism that allows resources to be scoped to an account of one user or a varying number of users based on the type of account. This way the resource(s) will be scoped to each customer of your SaaS/application.
By default when a new user signs up they will have an account created for them that does not allow them to invite anyone else to it. This is known as a personal (solo) account in Jumpstart Pro. After this initial account is created the user can create other accounts which will by default allow them to invite other users to the account. This is what many consider to be a team account. If you always want the accounts that are created when a new user signs up to be team accounts, then you can disable the personal account creation option via the configuration wizard.
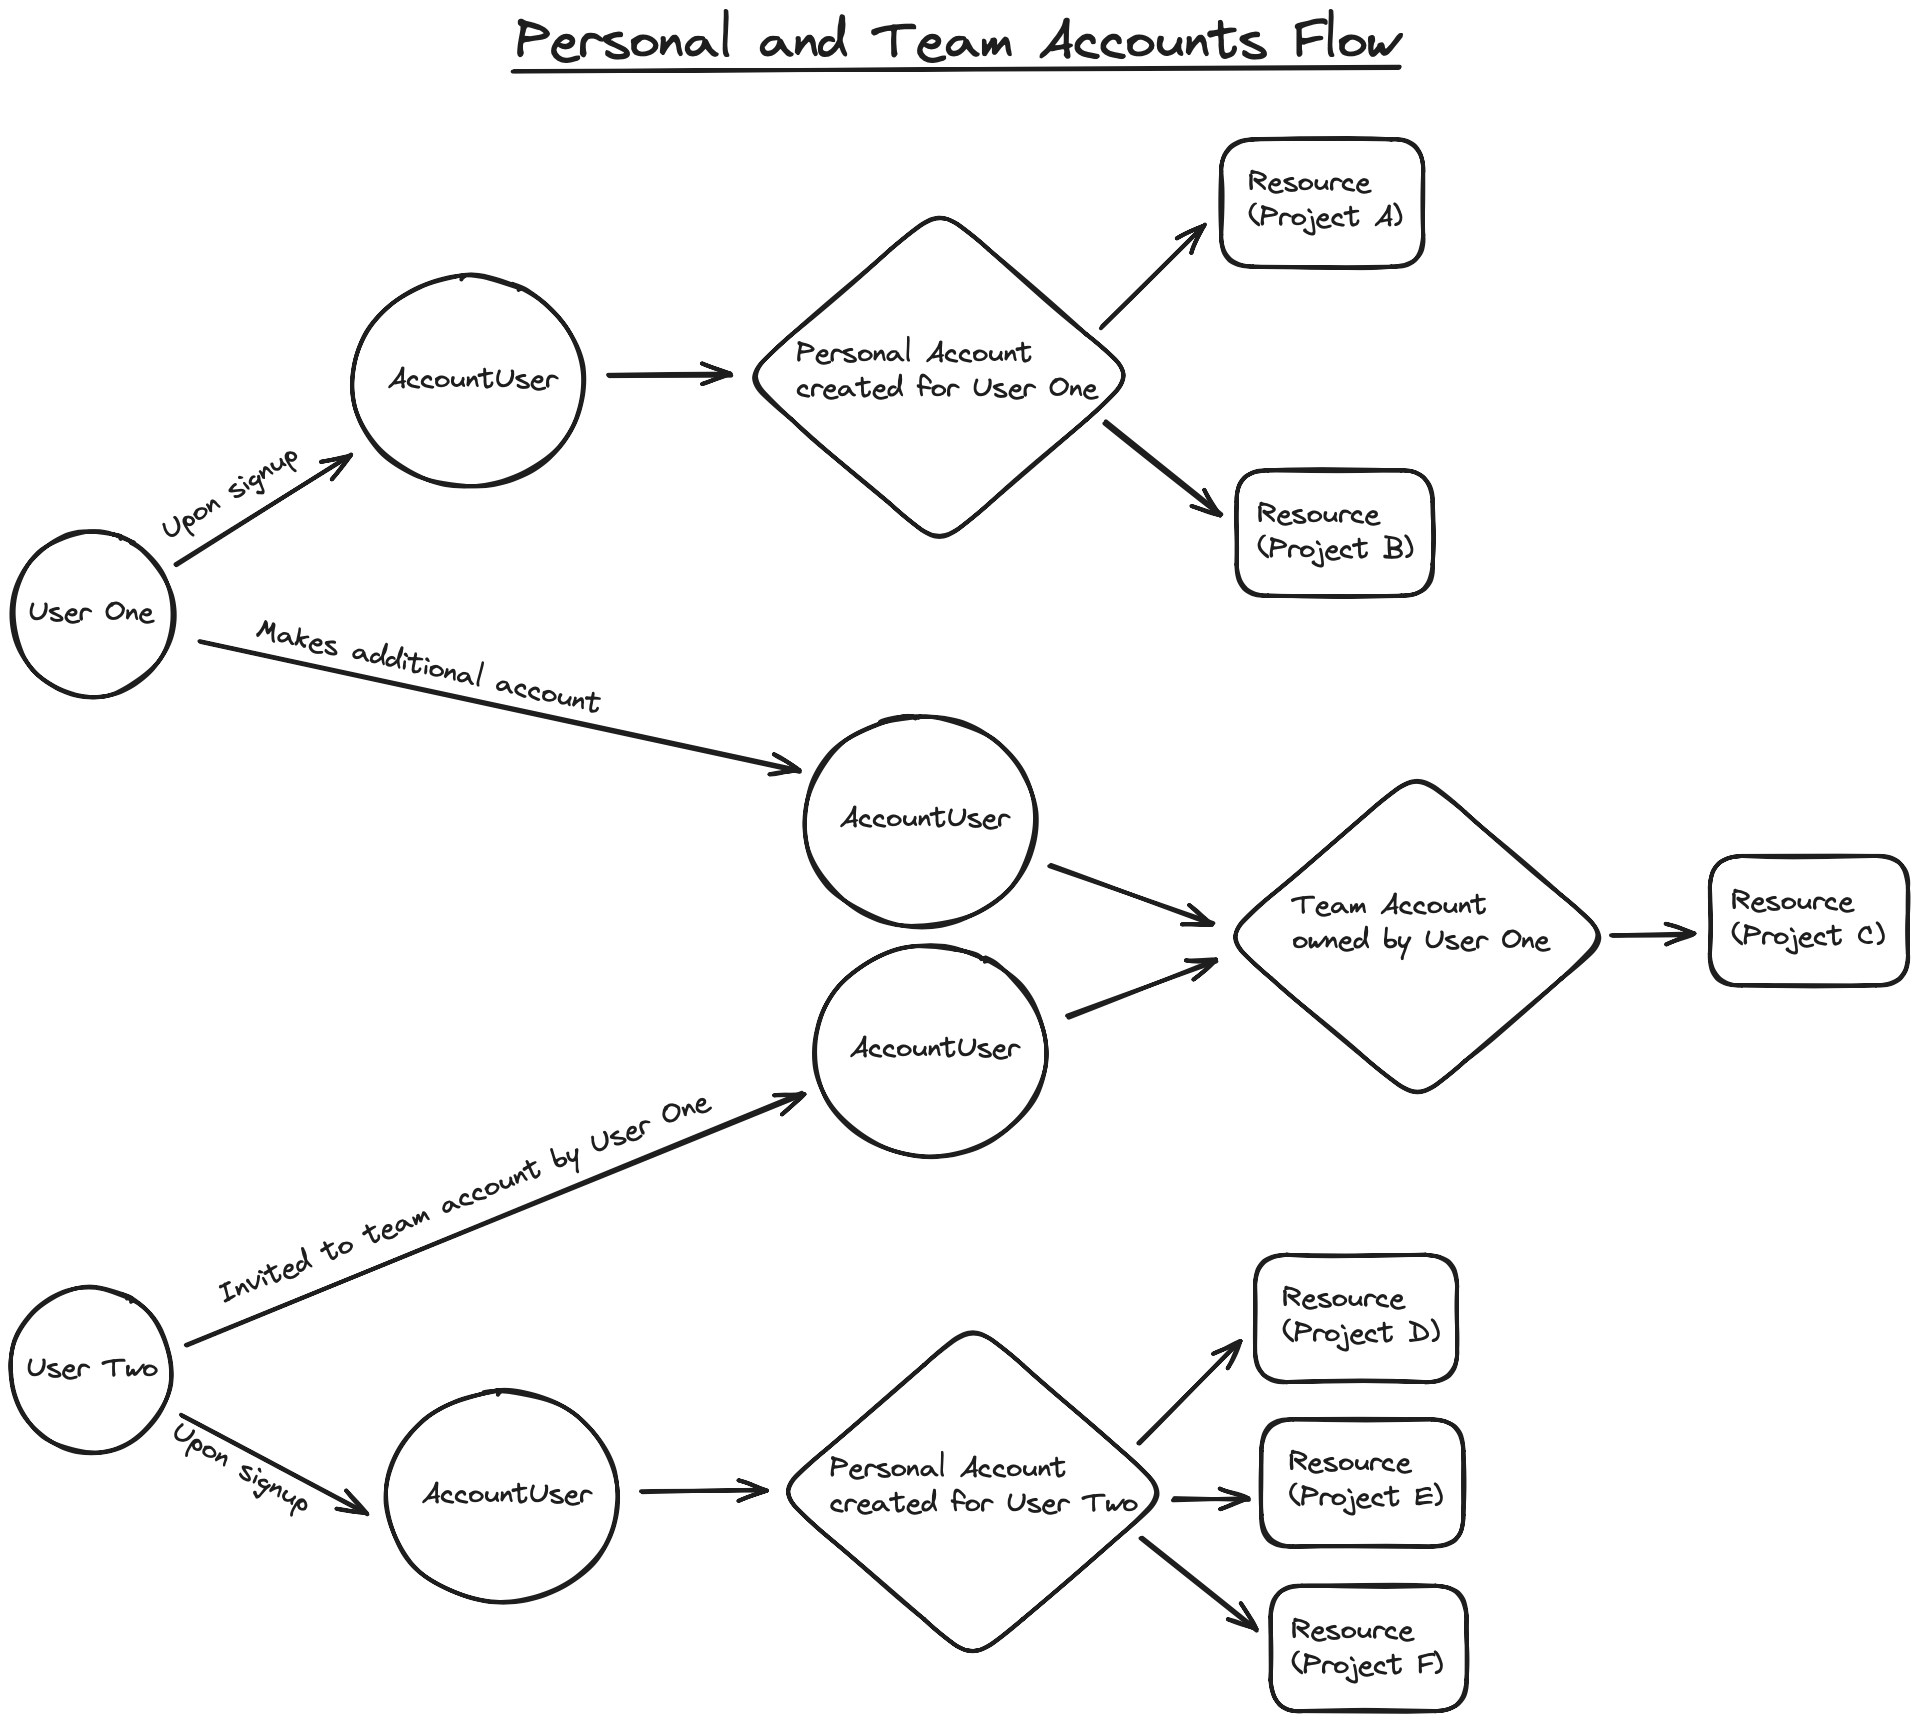
GitHub is an example of a similar flow that has both personal (solo) and team accounts. Many users of GitHub start off with a personal (solo) account and then later add new team account (GitHub calls these organization accounts) so they can add users and collaborate within that team account.
Continuing with the GitHub example when you first create your personal account, all of your repositories are only available to you. If you create a team account, you can then invite others to the team and share access to repositories to all members of that team. This type of team account is the account type that will be created every time an existing user creates a new account after the initial personal account in your Jumpstart Pro application out-of-the-box.
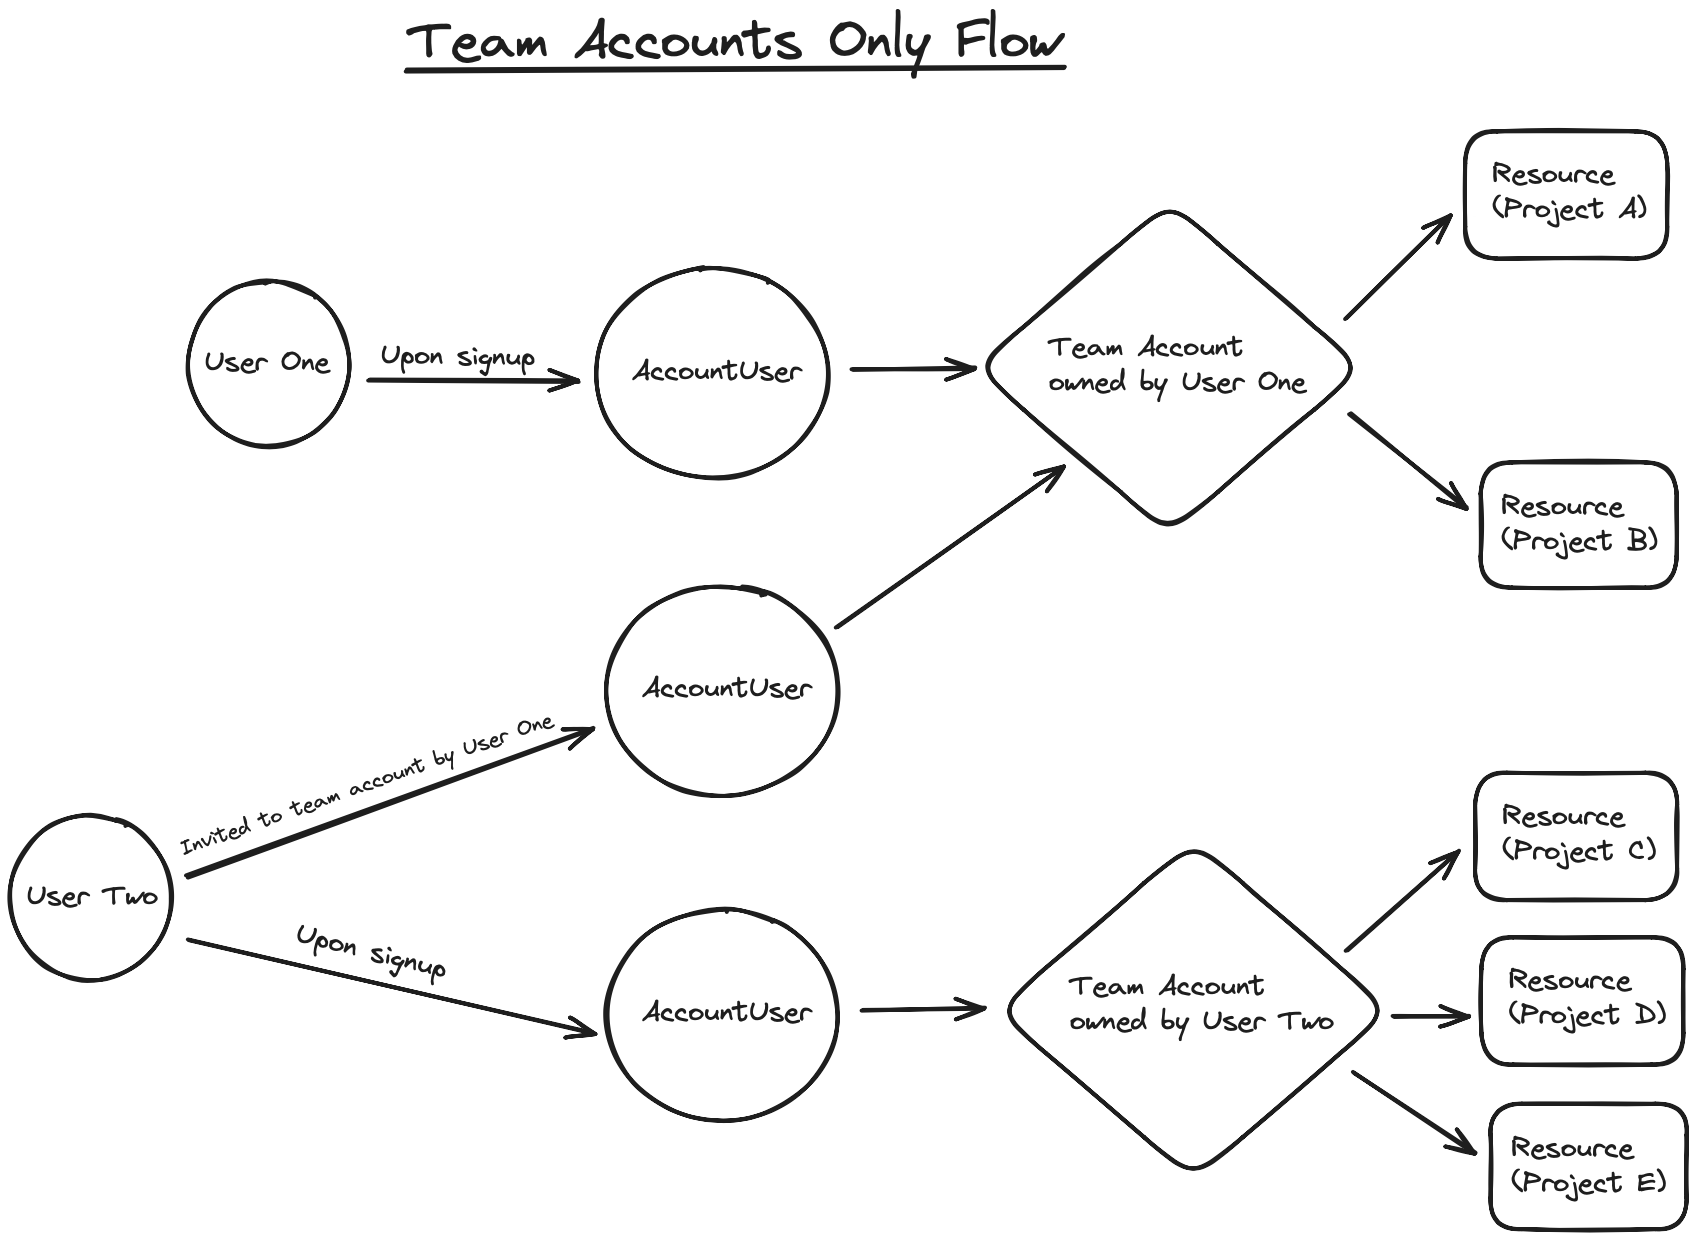
If you decide to disable the creation of personal (solo) accounts, then the default behavior is to create a team account for users upon sign up for your Jumpstart Pro application. If the initial team account has only one user it is similar to a personal account, but they can invite users later if desired or necessary. If so, this should be conveyed to the end user in the UI.
Personal accounts can be re-enabled later if you change your mind, however, any previously existing users will not have personal accounts and you will need to create them for each existing user manually. Additionally, if you don't want to use the accounts functionality, you can simply remove links to the accounts, however, we encourage you to keep the accounts functionality around as it allows you flexibility in the future should you choose to implement accounts later in the development of your application.
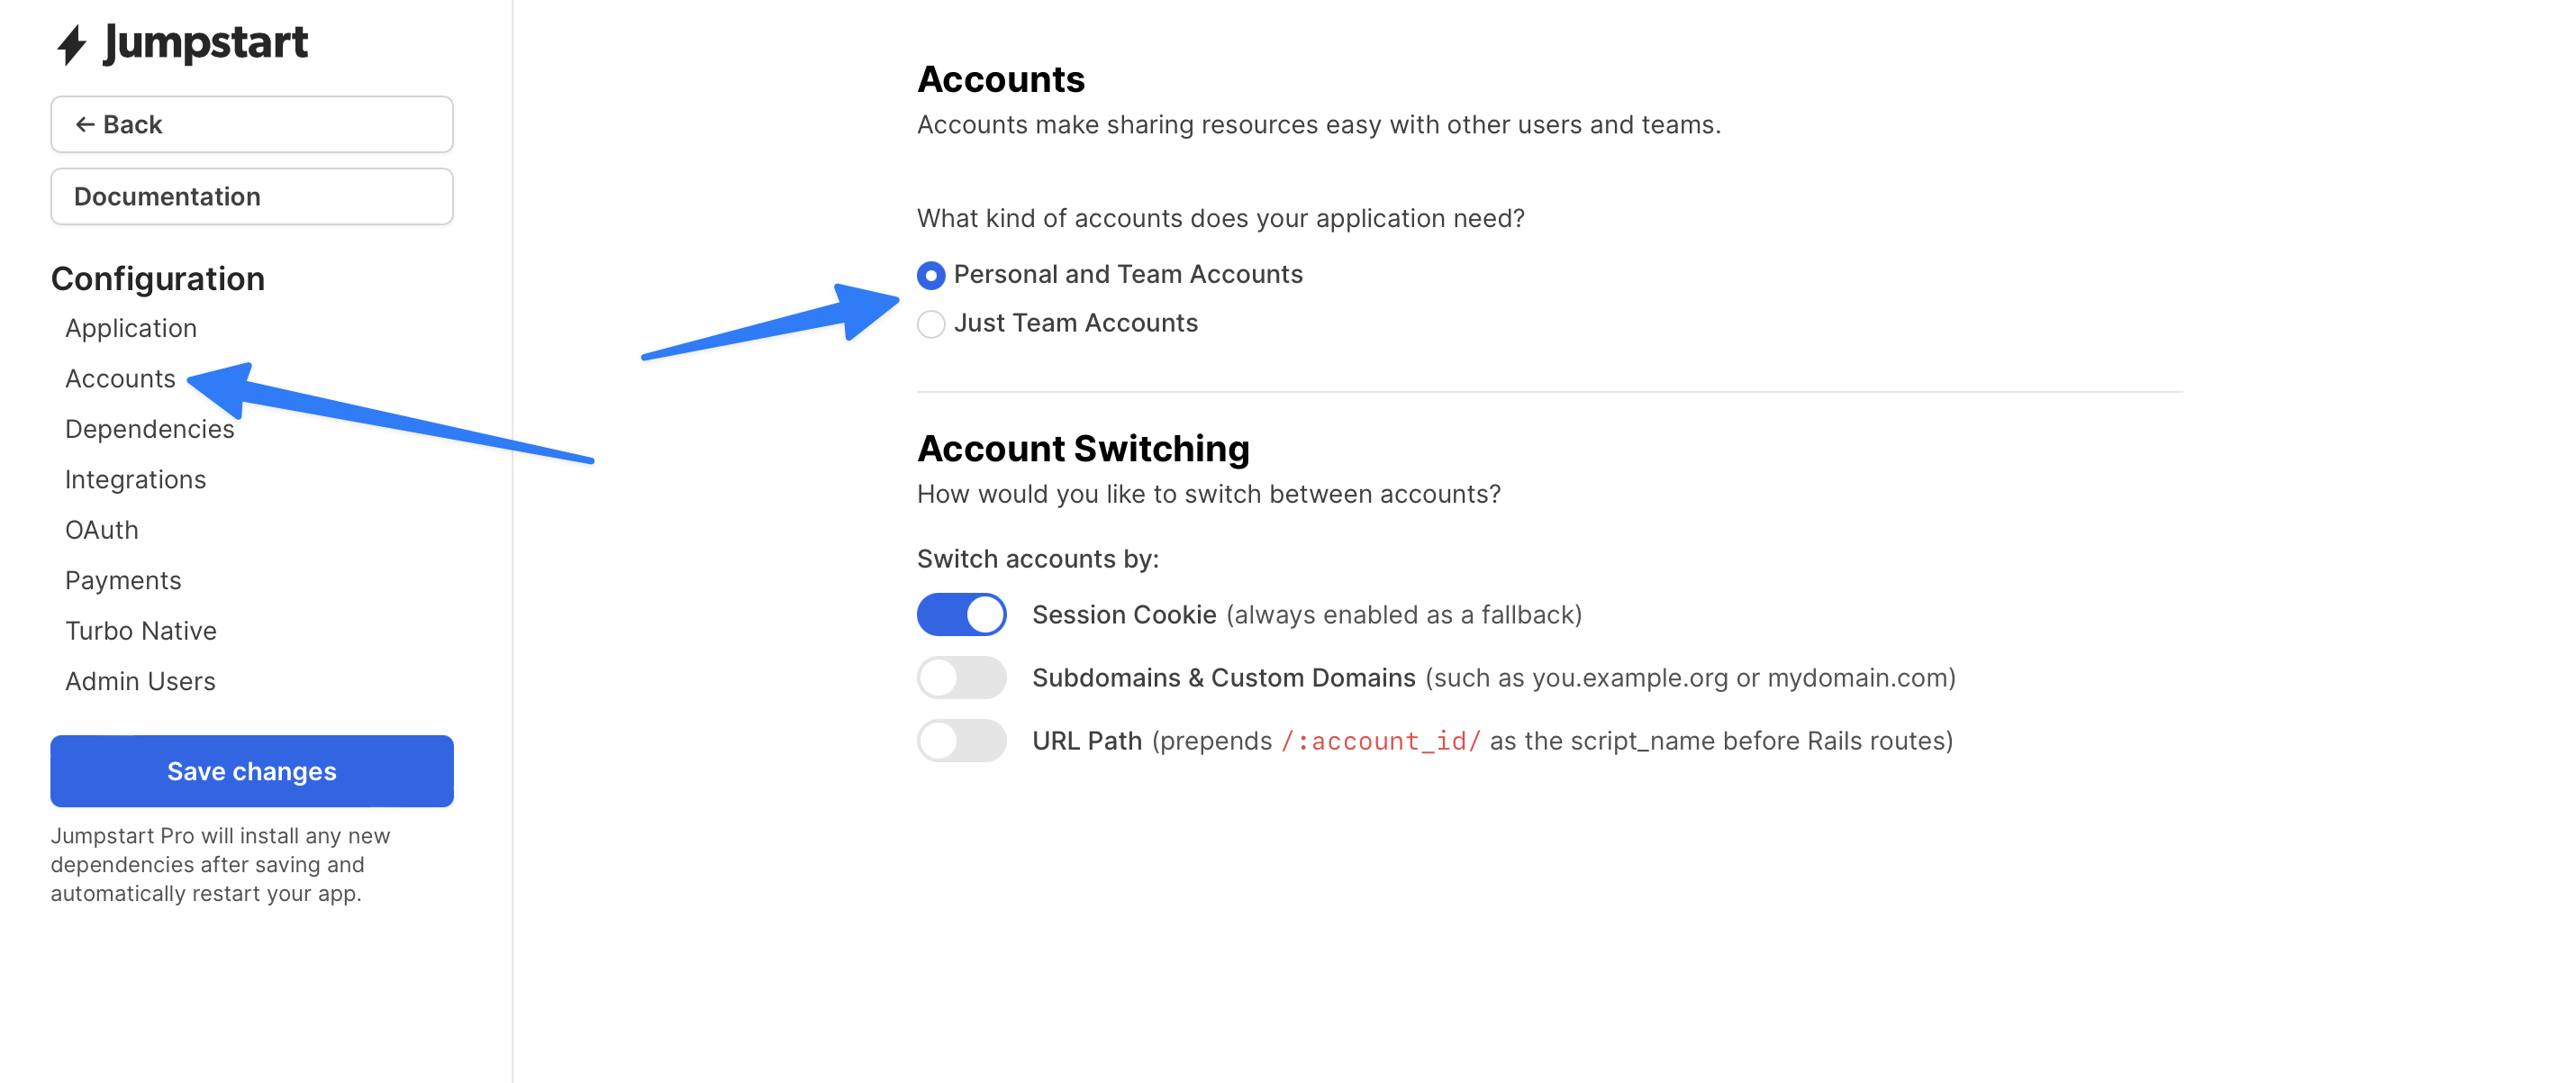
There is a configuration option (shown in the screenshot below) that can be found at /jumpstart if you have the server running. In the first section labeled Accounts, there is a set of radio buttons for "Personal and Team Accounts" or "Just Team Accounts". If the "Personal and Team Accounts" option is selected, then every new user that signs up for your application will be given a personal account by default.
NOTE: The default personal account is created via an after_create callback that comes from the UserAccounts concern which is included in the User class.
Working with Personal (Solo) and Team Accounts
When creating new resources that should be scoped to either type of account, make sure to add account:references when generating your models to set up the foreign keys. For example:
rails generate Post title:string body:text account:referencesYou can then scope the queries in your controllers to the current_account so the resources are shared between users in the associated account.
class PostsController < ApplicationController
  def index
    @posts = current_account.posts
  end
end
Using current_account in this way allows the code in Jumpstart Pro to be simplified by functioning the same regardless of whether the account in question is a personal or team account. This is why Jumpstart Pro uses current_account for a personal account with a single user instead of current_user. You do still have access to current_user in other cases if needed.
Account Association
Users in Jumpstart Pro can have many accounts, some of which they may be the owner of and others of which they may be members. You can query for all of a given users accounts via:
user.accounts
#=> [#<Account:0x0000000108f31728>, #<Account:0x00000001098735c0>]
Personal accounts on the other hand, have the relationship setup as a has_one association and can be accessed via:
user.personal_account
#=> #<Account:0x000000010935fca0>
Creating Accounts
If you ever need to create an account outside of the default Jumpstart Pro UI (for example in your Rails console for development or production), you can do so with the following lines of code (adjust argument values as needed):
user = User.first
account = user.accounts.new(owner: user, name: user.name)
account.account_users.new(user: user, admin: true)
account.save
Checking The Type Of Account
Building off of the previous code sample, if you need to check an account type to find out if it is a personal (solo) account or not, you can do so the following way:
account.personal?
#=> false
To check if an account is a team account, you can do so the following way:
account.team?
#=> true
Additional Accounts
After the initial account is created, all additional accounts created will be team accounts. These new team accounts allow the user to invite other users to join them.
Account Switching
Once created, users can switch which account they're viewing from the dropdown in the navbar where their avatar is displayed as seen here:

Any new accounts that are created by the user will be displayed in the dropdown as well by default.